Monday, March 4, 2013

Candied Orange Peels


I don't typically make candy any other time of year outside of the Christmas holidays (and for good reason!!), but I came across something I just couldn't pass up.  A lady I used to work with several years ago posted on Instagram some rather delicious-looking candied orange peels she'd made recently.  The kids and I had a rather massive looking pile of orange peels left over from after supper on Friday night, and since our compost bin on the kitchen counter was already overflowing, I decided to give this a try.

Peels in the pot ready to be boiled.
I think the next time I do this, I won't slice up my peels prior to boiling.  This made it a bit tedious when it came time to scrape the pith off the peels (which I recommend you do because it cuts down on the bitterness of the final product).

Boiling the heck out of those peels...5 times!

My friend likes to dip her orange peels in chocolate and let it set up, which I absolutely would have done as well, had it not been for my chocolate-orange-phobic husband.  *sigh!*  So, I skipped that step but did everything else.

And this pile of beautifully crystallized orange-y goodness is what happened!!

Sugar-coated candied peels drying overnight.

I followed her steps almost to the letter, the only difference being how I made my simple syrup, so let me recant for you what I did to arrive at this delicious result.  It's a bit laborious for candy, not to mention a bit of a drawn out process, but it sure was tasty.  Enjoy!  :)


Candied Orange Peels

Cleaned orange peels of 3 large oranges
2 cups water
1-1/2 cups raw sugar, divided
1/2 cup white sugar
Optional: Semi-sweet chocolate chips and a little milk for glaze coating


1.  In a large pot, boil orange peels at a rolling boil for 2 minutes.  Drain peels.  Repeat 4 more times for a total of 5 boilings.
2.  Meanwhile, in a medium pot, make a simple syrup by bringing 2 cups of water, 1/2 cup raw sugar, and 1/2 cup white sugar to a boil.  Reduce heat and simmer uncovered for about 15-20 minutes, stirring occasionally.
3.  While syrup is simmering, drain peels and cover with cold water.  When cool enough to handle, use the edge of a spoon to gently scrape off any white pith remaining.  Using a sharp knife, slice the orange peels into 1/4-inch strips.
4.  Add peels to simmering syrup.  Cover and continue to simmer for 45-60 minutes.  Remove from heat and allow to cool to room temperature.  Refrigerate overnight.
5.  Drain peels if necessary; do not rinse.  Transfer to a large ziplock bag with remaining 1 cup of raw sugar and toss to coat.  Arrange sugar-coated peels in a single layer on a wax paper-lined baking sheet.  Cover loosely with paper towels and allow to air dry for 24 hours.
6.  (Optional)  Dried peels can be dipped halfway into a chocolate glaze (melted chocolate with a little milk) and returned to the baking sheet to dry for a further 6-8 hours.
7.  Once dried (the insides will still be somewhat soft), transfer to an airtight container and store at room temperature.

-------xxx-------


Tuesday, January 15, 2013

A Little On The Side: Sweet and Spicy Sweet Potatoes

I have a few sweet potatoes left over from the holidays, and I really wanted to find something different to use them in.  So last night, I played around with some flavors I thought would work well together, and I ended up with this...sweet and spicy sweet potatoes!  I'm serving them with baked fish fillets and steamed green beans, so I think the overall dish will be figure friendly.  ;-)

The flavor was exactly as I'd imagined, sweet from the potatoes themselves and the brown sugar, and spicy from all the savory seasonings that went in.  I think this will be a hit with the family, so I'm going to probably double the recipe next time.  Give it a try!  It will go well with seafood, steaks, chicken...just about anything!

Here's the lowdown.  The actual amounts of seasoning can vary depending on your taste, so play around with it a little...

Ingredients:
2 large sweet potatoes
2 Tbsp olive oil
1/2 tsp salt
1/2 tsp ground black pepper
1 tsp Cajun seasoning
1 tsp garlic powder
1/2 tsp dried rosemary, crushed
1/2 tsp dried sage
1/2 tsp ground cumin
1-1/2 Tbsp brown sugar

1.  Preheat oven to 425 degrees. Peel sweet potatoes and cut in half. Microwave on high 3 minutes; allow to cool enough to handle. Meanwhile, line a medium sheet pan with foil and spray with cooking spray.

2.  When potatoes have cooled, dice into 1/2" cubes.  In a large bowl, toss potatoes with remaining ingredients.  Spread out on prepared sheet pan in a single layer.

3.  Bake potatoes for 15 minutes, stir, then bake for a further 10 minutes until tender and slightly caramelized.  Serve warm.
Posted by Picasa

Wednesday, October 31, 2012

Lasagna...in a Crock Pot??

In keeping with the slow cooking theme this week, I decided to try out something I've been seeing a lot of on Pinterest: Crock Pot Lasagna.  I've not done a lot of pasta dishes in the crock because I've always figured it would end up overcooked.

This, my friends, was no exception.  :-\

I began first by comparing various recipes online.  The sauce recipes are pretty standard fare, nothing exotic, so I decided to go with my sauce of preference, i.e. the one I usually fix for lasagna or spaghetti.


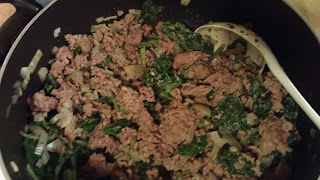
Brown the beef and onions, drain, add seasonings and frozen spinach.


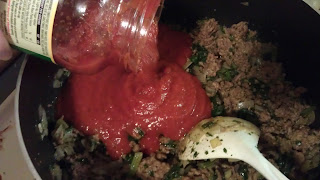
I use a low-sugar tomato-basil sauce.  In it goes!


My ricotta, egg, granulated garlic, Italian seasoning, salt, pepper, and cheeses combine in a separate bowl.  (The cheeses haven't been added yet in this photo.)


I love, love, LOVE these crock pot liners.  If you haven't tried these yet, you really should.  Line the crock and spray lightly with cooking spray.


I started with a ladle or two of sauce, then added regular lasagna noodles on top.  Break them up a bit so they fit.


Then I added about a third of my cheese mixture, followed by a generous covering of sauce.  The sauce was wetter than usual (I added about 2/3 cup water) in order to help cook the lasagna noodles.


At this point, you will repeat the layers until you use everything up, ending with the sauce on top.  A lot of recipes say to cook on low for 4-6 hours.  So, being the night owl that I am, I started the crock at about 11:30 p.m. (don't frown...I said I was a night owl!) and let it do its thing until I got up at 5 a.m. (there you go frowning again...), at which point I shut it off and sprinkled the mozzarella I'd reserved on top and covered it up.  Sorry, no picture of the finished product--I wasn't toting my camera around with me at 5 a.m.  LOL!

Sooooooo....?  The verdict?

Yes, about that.  While it tasted fine, there was something lacking in texture with this slow cooker lasagna that you get from the oven-baked variety.  There was no crunch!  If you're like me, you appreciate those dry, crunchy corners you get on the top of your oven-baked lasagnas, and this didn't have that at all.  (Of course not, I didn't expect it to!)  The noodles themselves were also way too soft, basically overdone, for my liking.  I'm a big believer in al dente pasta, and this wasn't it by a long shot.

On top of that, it turns out my slow cooker has a couple of hot spots, so there were some scorched portions at the bottom that weren't very pleasant.  Ground beef needn't be cooked to that extent, if you know what I mean.

Next time?  Probably going back to the oven for this one.  I love the convenience and the fact that we weren't heating up the house, but if I'm going to go through the trouble to make a layered casserole, I want the final result to be spectacular.  I suppose I could try a little less water, maybe 1/2 a cup instead of 2/3 cup, and reduce the cooking time by an hour, but I still won't see those crunchy corners I do so adore.

And for that, there simply is no compromise.  :)

Tuesday, October 30, 2012

Autumn in a Bowl

Photo taken from crockpot365.blogspot.com
The Hubs is trying to get our bonus room finished, so it looks like we're going to be investing more in crock-pot meals more than usual for a while.  I wanted to try something different from the usual soups, stews, and roasts, and I came across this blog entry by Stephanie O'Dea of "A Year of Slow Cooking."  She calls it her Autumn Sausage Casserole.

Well, it looked good and sounded pretty seasonal, so I decided to give it a try.  I made a few substitutions here and there for convenience.  Specifically, I switched out chicken sausage with kielbasa because I know my boys love it (although I happen to think chicken sausage is pretty darn tasty, too), used about 2/3 T molasses in place of the 1 T brown sugar (call it laziness, but the pantry door was already open, and I was looking right at it), used golden raisins instead of regular raisins, and added about 1/4 cup of pigeon peas (or Toor dal as its known in Indian dishes) to the rice as it was cooking.

So how did it turn out?  Personally, I loved the flavor.  The allspice and cinnamon really made you think of autumn, and it was a hearty meal in a bowl for sure.  The sweetness could be toned down a bit, but I don't know if that was from the apples I used or the molasses vs brown sugar swap.  Next time, I might leave the sugar out altogether.  I might also try using bulk turkey sausage to change it up some, but other than that, I'd leave it alone.  Oh, and add some celery.  I think that might have been the savory element it was lacking.  The pigeon peas had a little bit of bite to it, which was a very pleasant texture on the palate, but if you prefer, you could always sprinkle on some slivered almonds and have a similar effect.

Overall, while I don't think it was Hub's favorite dish of all time, everyone - kids included - cleaned their bowls.  I think that with a little tweaking to suit our tastes, this could be a big hit this fall!

More crock-potting goodness to come, so stay tuned!

Thursday, October 4, 2012

Slow Cooker Polynesian Meatballs

I will need to take a picture of this the next time I make it, but if you can imagine meatballs in a tangy BBQ and pineapple sauce with Asian-inspired flavors, peppers, broccoli, and sesame seeds over steamed rice, you got it!  I combined a few variations on the "Hawaiian meatball" idea and came up with this slow cooker version that I LUUURVE!  Sweet and tangy, filling, and not terribly bad for you.  What more can I say other than fix this.  Today.  Like, right now!


Ingredients:

  • 32 oz frozen meatballs
  • 1 large red or green bell pepper, large diced
  • 1 medium onion, diced
  • 15 oz can pineapple tidbits/chunks, drained and juice reserved
  • 2 Tbsp cornstarch
  • 1/2 cup barbecue sauce
  • 2 Tbsp light soy sauce
  • 1/2 cup cider vinegar
  • 1/2 packed light brown sugar
  • 1/2 tsp sesame oil
  • 8 oz frozen broccoli florets
  • Hot cooked rice
  • Toasted sesame seeds (optional)

  1. Spray insert of slow cooker with cooking spray.
  2. Add meatballs and top with peppers, onions, and pineapple.
  3. To reserved juice, add cornstarch and whisk until smooth.  Add barbecue sauce, soy sauce, vinegar, brown sugar, and sesame oil.  Mix well.
  4. Pour sauce over meatballs and cook on low 3-4 hours.
  5. 1 hour before dish is done, stir in frozen broccoli florets.  Serve over hot cooked rice and garnish with sesame seeds, if using.

Sunday, September 30, 2012

The BESTEST Banana Pudding!


The other day, the boys and I were at the store and found some banana pudding in the deli section on special.  It's been a while since I bought dessert of any kind, and they'd been good, so I thought, what the heck!

It turned out to be just banana-flavored pudding mix with vanilla wafers and some Cool Whip.  No actual bananas.  What in the world...?!

While my boys enjoy banana desserts, and they ate this pudding up without question, I was a little disappointed.  What a let down!  I started thinking back to the banana pudding I'd made for Thanksgiving one year, and I decided it was time it made a reappearance.

Personally, I prefer real whipped cream to the fake stuff you buy in tubs at the store.  *Bleck!*  You can control the consistency better, too, plus if you're going to eat something less than healthy for you, you may as well eat something natural (i.e. cream) vs. chemically enhanced, partially hydrogenated food stuffs that aren't really, well, FOOD!

This is a no-cook version adapted from a couple of recipes I found on allrecipes.com.  I consider this dessert a "make ahead" because you really want it to sit in the refrigerator for a while before you serve it.  It'll give the vanilla wafer cookies a chance to absorb some of the flavors and soften up a bit.  And don't let the sour cream scare you off either.  It adds to the creaminess and makes it a little less sweet, which is how we prefer our desserts anyway.  If you want to save a few calories, opt for sugar-free pudding mix instead and go with lowfat milk.

Enjoy!


Nabela's No-Cook Banana Pudding
  • 1 cup heavy whipping cream
  • 1 Tbsp sugar
  • 4 oz sour cream
  • 1-1/2 cups cold milk
  • 1 (3.4oz) box instant banana pudding mix
  • 1 tsp vanilla extract
  • 1 box vanilla wafer cookies
  • 2 large bananas, sliced

  1. Using a hand mixer on low speed, whip the whipping cream for about 2 minutes until just starting to thicken.  Add sugar and continue to whip until soft peaks form.
  2. Add sour cream, milk, and sprinkle banana pudding mix on top.  Add vanilla, and continue to mix until well combined, about 3 minutes more.  Pudding will still be slightly runny.  Set aside for 5 minutes to thicken.
  3. In a round 2-qt dish, place a layer of vanilla wafers covering the bottom of the dish.  Add about 1/3 pudding mixture, then a layer of bananas.  Repeat layers.  Finish with remaining pudding mix.
  4. Crush remaining vanilla wafers and sprinkle on top.  Cover and refrigerate at least 1 hour prior to serving.

Friday, February 17, 2012

Getting Back in the Kitchen...??

Hold on to your hats, folks!  It looks like I'm going to be making a reappearance in the kitchen!  LOL  Yes, Hubby's working in town now, but our schedules have left us high and dry when it comes to preparing meals.  I hate doing things on the fly, which is what we're going to have to do today.  Ugh!

Anyway, it looks like I'll be resurrecting my blog and beginning to post again.  (Yay, me!)  I know.  You're all so excited, right?

Well, I like to think you are.  :)

I'm excited about trying out some new recipes.  I've got a lot of great ideas from Pinterest, one of my new hobbies, apparently.  LOL!

Looking forward to sharing my kitchen experiences with you again soon!  Muah!

Tuesday, November 1, 2011

Out of the Kitchen

I've not been posting lately because my Hubby is back home for the winter, and he typically does the cooking!  (I know, right?!)  Yes, I'm lucky.  It's nice to come home to a hot meal and not have to worry about anything but cleaning up the copious dishes and pots and pans the man goes through.

I will say this, however: There are a LOT of dirty dishes out and about in our household lately.  I can have the sink completely empty, and by the next evening, it'll be standing slap full a whole foot above the sink itself!  Now how does it DO that?!?  We save the plastic kiddie cups most restaurants use for children's beverages, and my boys will use them at meal times.  But we go through half a dozen or so of these things a day, especially on weekends!  And they start to show up in some of the strangest places around the house...

We're still trying to keep our meals healthy.  He's actually being very nice about accommodating my request to NOT cook everything in bacon fat!  LOL  I do kid.  We've been eating pretty healthy for years now, always trying to include vegetables when we can, almost never deep frying our foods except on rare occasions, and now starting to use cooking methods that help cut down on the fat and unnecessary calories.  And the new foods we've been trying are actually quite good, things even he and my carb-loving boys seem to enjoy!  So life's pretty good right now.

Anyway, I'll try and take pictures and post recipes when I do cook on occasion, or if Hubby fixes something particularly worth bragging about.  But in the mean time, I'll just grab my fork and head for the table to see what's for dinner.

Laters...

Wednesday, October 5, 2011

Meatballs!

Meatballs.  You know, this is a very versatile food that spans cultures the world over.  I think back to my childhood days, and the first thing that pops into my mind is the Indian kofta curry (of which there are MANY types, but Mum's were always made with ground beef) that my mum used to make and served with rice.  Then there are Swedish meatballs (something I still haven't tried to make but will eventually get around to), not to mention albondigas (a Mexican meatball soup), and another one of my personal favorites, Chinese-style fish ball soup. (Check out this recipe here for a delicious Malaysian version I grew up eating.)  But I think the most iconic meatball dish has got to be the Italian meatballs in marinara served over spaghetti.

While following my new figure-friendly cooking habits, I came across this recipe that uses ground chicken in place of ground beef.  I couldn't find ground chicken at the store on the particular day I was shopping, so I went with ground turkey instead.  And since I have two young kiddos to cook for, I made the meatballs half the size of what the recipe originally called for.  Once you have the meat mixture mixed well, roll out the meatballs, and give them a quick browning on all sides (or as best as you can, since these are soft and tend to flatten as they cook, so you end up with little triangular pyramid-shaped meatballs...lol...)

Meanwhile, you'll have your marinara simmering away in a large pot--note the LARGE pot, as you'll eventually need to add your meatballs to the sauce, something which I neglected to take into consideration at the time and wound up having to switch halfway through.  Cook up some spaghetti, whole wheat, and serve with a sprinkle of parsley and grated parmesan cheese.  The kids wolfed it down pretty quick, so I guess this worked out well, and it also reheats beautifully.  It's a definite "keeper."

I also made some meatloaf this week using lean ground beef, mashed potatoes (3 parts potato to 1 part cauliflower), and steamed veggies on the side.  If all works out time-wise, I also have a recipe for Shrimp Creole that I'd like to try, served over a bed of brown rice.  I even splurged and bought some white wine to cook with!

Healthy eating needn't break the bank, but usually you do end up paying more for quality ingredients.  I've noticed this while making the switch from processed to more whole foods, and the sad truth is that healthier eating just doesn't make it onto those dollar menus.

I think the government and FDA needs to take this into consideration.  You want people to be healthier in an effort to lower healthcare costs down the road?  How about making healthy food options and ingredients more affordable to the masses?!  I know, I know, there are so many factors that go into the equation, but I can dream, can't I?

But anyway, back to the meatballs in marinara.  The recipe is simple, the method straightforward.  Here's what I did...


Turkey Meatballs in Spicy Marinara

- 1 pound ground turkey
- 1 cup egg substitute
- 1/2 cup rolled oats
- 1 slice whole wheat bread torn into small pieces, moistened in water, and squeezed out
- 1/4 cup chopped fresh parsley (can use flat-leaf Italian)
- 1/4 cup grated parmesan cheese
- freshly ground black pepper
- 2 (28oz) cans diced tomatoes OR 3 (14.5 oz) cans diced tomatoes PLUS 1 (14 oz) can tomato sauce, use "no salt added" varieties if available
- 1 tsp canola oil
- 1 Tbsp minced garlic
- 1 Tbsp chili powder (or to taste)
- red pepper flakes or cayenne pepper (optional)
- 1/2 tsp Italian seasoning
- a few pinches of cinnamon
- 1-1/2 Tbsp agave nectar or some other sweetener
- extra parsley for garnish

1.  Combine first 6 ingredients; mix well.  Separate into 12 large meatballs (or 24 small ones) and brown on all sides in a large, nonstick skillet sprayed with cooking spray over medium heat.  Cook in batches to avoid overcrowding the pan.

2.  While meatballs are browning, in a large pot, bring tomatoes to a boil, then reduce heat to medium-low.  Let simmer about 10 minutes.

3.  In a separate small pan, heat canola oil and cook garlic just long enough to become fragrant but without browning.  Add chili powder with enough water to make a paste.  Add red pepper or cayenne pepper if using.  Cook 1 minute, then transfer to tomatoes.  Add Italian seasoning, cinnamon, and agave nectar.  Mix well.

4.  Transfer browned meatballs to tomato mixture.  Allow meatballs to finish cooking in simmering marinara, approximately 10-12 minutes more.  Serve over spaghetti and garnish with parsley.


Have a great rest of the week!  :)


Monday, September 19, 2011

Guiltless Lasagna...You Heard Right!

What can be more comforting than a wonderful, meaty, cheesy piece of lasagna?  I made this last week, a recipe straight out of the Food Lovers program.  The dish is designed to have as little impact as possible on your blood sugar (therefore avoiding a spike in insulin levels), so it's probably the most healthy version I've ever attempted in my kitchen.  (By the way, this approach to eating is an excellent practice for people who are dealing with diabetes or have unstable blood sugar.)  This is the picture of an actual slice, and although it's not the neatest cut, it still looks pretty darn good.  LOL!  My kids aren't big fans of bell peppers, yet I still cook with them.  However, since you do use a whole red pepper AND a whole green pepper in here, I think I'm going to have to puree them or something, just so I can sneak them into the sauce.  If they can't see them, they'll eat them.

That being said, they didn't seem to mind the generous helping of spinach mixed in with the cheese, so I guess it's not all a loss.  Ha!  Flavor-wise, I give it nothing but rave reviews.  This also happens to be one of the tastiest lasagnas I've made, and I have to say my lasagnas are pretty good either way.

But be warned: This makes a FULL 15x10 pan.  My humongous 5-quart Pyrex was slap full, as it does make 12 portions of lasagna.  But since I'm not going portion-crazy and actually paying attention to portion size, it means having leftovers...a LOT of leftovers.  I will definitely make this again, but it will have to be when my husband's home to eat the rest of it.  Meanwhile, I've tried freezing individual portions, so one of these days, I'll report back on how well they thaw and reheat.  Watch this space.

I've promised folks in my Facebook group of the same name (which you can get to right here) the recipe for this dish, and here it is.  Have at it, and enjoy every bite knowing that you're doing something good for yourself and your body.


Nabela's Version of the Food Lovers' Lasagna

16 whole wheat lasagna noodles
1 pound lean ground beef (can use turkey)
1/4 tsp ground cinnamon, optional
1 medium green bell pepper, chopped
1 medium red bell pepper, chopped
2 (24 oz) jars Prego Tomato and Basil sauce (I used Ragu Sugar Free Tomato and Basil)
4 cups low fat, small curd cottage cheese
8 oz frozen spinach, thawed and excess water squeezed out
1 large egg, beaten (can use egg substitute)
2 cups part-skim shredded mozzarella cheese
1/4 cup grated Parmesan cheese
salt and pepper

1.  In a large pot, prepare lasagna noodles according to package directions.  Lay cooked noodles in a single layer on cookie sheets covered with wax paper.
2.  Brown beef (or turkey) and drain.  If using, add cinnamon.
3.  Add bell peppers and cook over medium heat for 7-8 minutes until tender.  Season with salt and pepper to taste.
4.  Add pasta sauce.  Bring sauce to a boil, then reduce heat and let simmer 10 minutes.
5.  Meanwhile, in a medium bowl combine cottage cheese, spinach, egg, and 1/2 cup mozzarella cheese.  (I would also add a touch of salt.)
6.  Spray 15 x 10 glass dish with cooking spray.  Ladle a small amount of sauce into dish to lightly coat the bottom.  Lay 4 strips of lasagna noodles lengthwise along the bottom, and trim a 5th piece to fill the space on the end.  Add 1/2 the meat sauce over the noodles and spread evenly.
7.  Trim 6 lasagna noodles to fit across the width of the pan.  Lay these out, then add all of cottage cheese mixture and spread evenly.
8.  Lay 4 lasagna noodles lengthwise and trim the last piece to fit the end.  (You will have extra trimmed pieces left, which you can layer over the top.)  Add remaining meat sauce and spread evenly.  Top with remaining mozzarella and grated Parmesan.
9.  Cover tightly with foil.  Bake in a 375-degree oven for 40 minutes.  Remove foil and bake an additional 10-15 minutes until cheese is melted and bubbly.
10.  Allow to cool several minutes, then cut into 12 equal portions.


You can fill this out with a side salad (watch the dressing), or perhaps a cup of vegetable soup.  Or enjoy it on its own!  It's quite filling.

Until next time, happy cooking!  :)

Thursday, September 8, 2011

The Incredible Edible Pea Pod


I've done the shrimp fried rice a few times now, and I'd say I'm quite getting the hang of it.  This week I found a great deal on a bag of snow peas (I still call them "mange tout" from my days in England), and I was inspired.  I LOVE these things in stir fries!  Basically, snow peas (a.k.a. sugar snap peas) are your regular garden peas just in "baby" form.  In fact, the French term describes it quite accurately, mange (pronounced MONGE with a soft G) meaning "eat" and tout (pronounced TOO) meaning "all."  You do quite literally eat it all, pod and all!

For those of you wanting a bit more in depth discussion, please check out this link here.

So, grabbing a bag of salad shrimp--which were on sale, as opposed to the usual small/medium shrimp I buy--I went with the Minute brown rice (I was in a bit of a time crunch) and threw this together in literally minutes.

Shrimp Fried Rice with Snow Peas

Neither of my boys cared for the snow peas, which mortified me for about 2 seconds, at which point I happily scoffed them.  LOL!  As a backup, however, I did include the peas and carrots for a little extra veggies, since I was skipping the mung bean sprouts this time.  (I know, sinner that I am.)

As usual, my youngest boy ate up all the rice and shrimp, carefully picking around anything that resembled a vegetable.  What surprised me was how, when finished, he proceeded to shovel the peas and carrots into his mouth until there was nothing left!

SCORE ONE FOR MOMMY!!!  <punches the air and mentally yells, "YES!!!">

My oldest boy calmly ate through two helpings of the stuff.  I was chuffed.  That's the beauty of stir fries though, they're so versatile!  You can make them with rice, noodles, or skip the starches and go with meat and/or veggies!  The sauce can be as simple or complex as you like.  And the best part...it all comes together in a matter of minutes.  I'm thinking of doing something with noodles next time, perhaps some of the thin and delicate rice noodles I've seen in many Asian stores or in the ethnic food aisles at the local grocery stores.  The possibilities are endless!

As for the rest of this week, well, we're still trying to get back on track with the cooking.  Leftover grilled chicken from this Labor Day weekend has made an appearance (of course it always tastes better the second time, when there's much less of it), and this Friday will be our recipe exchange dinner, so I'm not sure exactly what we'll be eating.  I'll be bringing the sausage, apple, and cranberry stuffing that's been the highlight of our last few Thanksgiving dinners, so hopefully that will go down well!

More next week, fellow foodies!

Thursday, September 1, 2011

Going Greek (and Asian)!

Wow!  September already, huh?  It's getting to that time of year, my favorite time of year actually.  The colors, the cooler weather (big plus), and of course, the food!  This final quarter of the year has a couple of biggies, namely Thanksgiving and Christmas, both of which have their own special menus and flavors.  Getting exciting!

Ok, so this past week was another crazy one.  My oldest boy is back in soccer this Fall, and he's also joined up with the local Tiger cub scout pack.  That means we're now going to have to eat out on Tuesday nights until Hubby is in his off-season from work, but that just means I'm going to have to find healthier food options besides the McDonald's drive through, which we resorted to this week on account my bus was late and I missed my connecting bus home.  Anyway, I made it in time to get the boys and get to the pack meeting, I just didn't make it in time to take them somewhere decent to eat.

So the first dish I prepared was a Greek spin on a simple pasta dish.  I took a recipe from a newspaper clipping and changed it around a bit...actually a lot...to suit our tastes.  The dish starts with browned ground beef and onions, drained, and then to that I added chopped zucchini, yellow squash, and tomatoes, all from our garden.  (The garden's on it's last leg now, the only viable part of it remaining are the green beans.)  Added a can of low-sodium beef broth and 1-1/2 cups of orzo, bring to a boil, then simmer for about 8 minutes until the orzo was tender.  Added in some frozen cut leaf spinach and about 1/4 cup crumbled feta cheese, cooked for another 2-3 minutes, and done.  Sprinkle about another 1/4 cup of feta on top and serve.  Since I used low-sodium beef broth, I did end up having to add a little bit of salt to get it where I wanted it.  At least you have that kind of control, which is what I love about low-sodium products.

My reheated version was good, just needed to revive it a little with some water because the pasta soaked all the beef broth up.  Also, since I used frozen spinach instead of fresh, the vibrant green color I've come to love is lacking, not to mention the lighting wasn't very good when taking this snapshot.  Oh well, at least the flavors were there.  The boys cleaned their plates, and the youngest wanted seconds, so I guess we're keeping this recipe.  LOL!

Taken from Publix.com
Next up is a recipe I clipped from a Publix sale paper, Brazilian chicken curry.  This picture is from their recipe, but honest to goodness, mine looked almost identical!  I just didn't have my camera handy.  Really!  :)  I did make changes though, since I've started using garlic ginger paste in my cooking in place of actual minced garlic and ginger.  I substituted 4 tsp of the paste for the garlic and ginger called for in the recipe, and instead of making the packaged brown rice, I made my own coconut rice!  I got the idea from a traditional Malaysian dish (my mother is from Malaysia after all) called nasi lemak, which you can read about here.  The coconut milk I used in the curry comes in a much larger can than I needed, which was only 1/2 a cup, so I used the rest of it to make my rice.  I use the 1st-knuckle method, which I will describe, since I'm of the school of thought that prefers rice cooked in a pot as opposed to a rice cooker.  (We received one as a wedding gift almost a decade ago and have yet to use it!  Who knows...maybe I'll get crazy one of these days and try it out.)  I like the addition of sugar because if serving a spicy dish, the slight hint of sweetness helps to balance the flavors.  That being said, I think my final result was more Asian than Brazilian, and if I could get my hands on some lemongrass, that would have given it that much more of an oriental flavor.  I'd use that in place of the cilantro.  Anyway, here's the rice recipe below:


Simple Coconut Rice (serves 4)

- 1-1/2 cups white rice (I use basmati, but jasmine rice will give a good result and is more traditional)
- approx. 1-1/4 cup coconut milk
- 1 tbsp sugar, more or less as desired
- pinch of salt

1.  In a medium saucepan, wash and drain rice 6-7 times with water until it runs clear; drain.
2.  Add coconut milk and enough water so that the level reaches your 1st knuckle when touching the top of the rice with the tip of your finger.  Add salt and sugar, if using.
3.  Cover tightly and bring rice mixture to a slow boil over medium heat, stirring every few minutes to avoid sticking and burning.
4.  Once bubbling, turn heat down to LOW; set lid askew to allow steam to vent, and cook an additional 6-8 minutes until liquid has evaporated.  Test rice for doneness.
5.  Remove from heat and cover tightly again.  Allow to sit 5 minutes.  Fluff with a fork and serve.

*Optional: Dress up the rice with a little toasted unsweetened coconut sprinkled on top prior to serving.


I will say that while reheating leftover rice is ok, you'll need to add some water to recreate the steam, otherwise it will be dry.  You could also try using it in a spicy stir-fry dish, which might make a nice and unexpected change!  Experiment and have fun with it.

Enjoy, and see you back here next week (I hope)!

Friday, August 12, 2011

Shrimp Fried Rice Revisited

Sometimes, first attempts don't always turn out right.  So this week, I gave the shrimp fried rice recipe another shot.  I increased the eggs from 2 to 3, added some ground ginger and garlic chili sauce to the beaten eggs, and added some frozen peas and carrots along with the shrimp.  I think I also added a little extra soy sauce because (once again) I used a whole bag of bean sprouts instead of the suggested 1 cup.  I also omitted the baby corn and sliced mushrooms because I forgot to buy them and didn't have any on hand.  I also didn't think I had any green onions (hence the peas), but it turns out I did, so maybe I'll use them next time.  Oops!

I have to say I was more pleased with the flavor this time.  The kids ate it up, too, but as usual, I like to doctor mine up with a little extra something.  For that, I like to add a little sweet chili sauce.

This sauce is pretty hot, so start of slow and add only as much as you need.  It gives this wonderful sweet heat that makes stir fry dishes POP!  I suppose it would be pretty good on just about anything, but that's just me.  :)  Hmmm...I wonder how well it would go with a bowl of vanilla ice cream....?  Just a thought.

We had a bit of a hectic week this week, so a quick throw-together meal we had one night was a popcorn chicken salad.  It really is as simple as it sounds: Bagged salad mix, cottage cheese, shredded cheddar cheese, chopped tomatoes, popcorn chicken right from the grocery store deli, Ken's honey mustard dressing (I've found I can get the little guy to eat salad so long as it's drenched in honey mustard dressing), some garlic herb croutons, et voilà!

A pound of ground beef can go a long way, when you're cooking for 1 adult and 2 little kiddos.  I used it to make a taco salad (served over crushed up tortilla chips with all the fixings) and a very simple Cowboy Beans recipe.  Both were received very well, I'm please to say.  In fact, while I was prepping the taco beef for the salad, I had another pot on the stove with the Cowboy Beans bubbling away.

Hopefully things will be a little less crazy this weekend, so that I can get back to some more involved recipes.  In the mean time, here's my version of simple Cowboy Beans...


Cowboy Beans (serves 2)
Ingredients:
-1/2 lb lean ground beef
-1/2 medium onion
- large can of your favorite baked beans (at least 20 oz)
- about 1/4 cup barbecue sauce
- about 1/4 lb bagged frozen spinach (no need to thaw)
- fresh ground black pepper

Brown beef with onion in a 3-quart pot.  Drain excess fat.  Add remaining ingredients and bring to a boil.  Immediately reduce heat and simmer until heated through and spinach has thawed (about 10 minutes).  Enjoy!

Friday, August 5, 2011

Whole Wheat Baked Ziti

Last week, I revisited the baked ziti dish, only this time I put my own spin on it.  I'd been doing some reading into low-glycemic index foods, and it turns out that whole wheat pasta is low(er) compared to regular pasta.

Those of you with a sharp eye will also notice I didn't use ziti pasta.  I couldn't find whole wheat ziti noodles at my local store, so penne was the next best thing.

The whole process is very straightforward, and pasta dishes with lots of cheese are a guaranteed hit with my boys, so this is going to become a regular in my recipe repertoire.  Here are the ingredients and steps...


Whole Wheat Baked Ziti/Penne (serves 8-10)

Ingredients:
16 oz whole wheat ziti/penne pasta
16-24 oz ricotta cheese
16 oz shredded mozzarella cheese, divided
1 egg, beaten
2 cloves garlic, minced
1 tbsp dried Italian seasoning
2 cups torn baby spinach leaves
salt and pepper to taste
24-32 oz jar garden style pasta sauce (or your favorite sauce), divided
about 1/4 cup grated Parmesan cheese

Method:
1.  Cook pasta according to package directions.  Remove and drain while still slightly undercooked; set aside.
2.  Preheat oven to 375 degrees F.
3.  In a large bowl, combine remaining ingredients along with 2/3 of the mozzarella cheese and 2/3 of the pasta sauce.  Add pasta and mix to coat evenly.
4.  Spray a 9x13 baking dish with cooking spray and spoon pasta mixture into the dish.  Top with remaining sauce and mozzarella cheese.  Sprinkle on Parmesan cheese.
5.  Cover tightly with foil and bake for 30 mins or until heated through.  Allow to set 10-15 minutes prior to serving.


Since you have the spinach in the dish and the veggies from the sauce, this can be a good one-dish meal.  If you want to add more veggies to the sauce, cook them down a little first.  The leftovers are great!  Enjoy!  :)


Thursday, July 21, 2011

Watermelon: The Definition of Summer


I had a bunch of watermelon and blueberries to use up this week, so in addition to cooking main dishes for the week, I made a couple of extra things on the side.  The lineup for this week's meals plus the extras:

  • Garden Risotto with Chicken
  • Smoked Turkey and Beans with Jalapeno Cheddar Cornbread
  • Balsamic Glazed Salmon
  • Mac-n-Weenies
  • Mini Blueberry Tarts
  • Watermelon Slushes
Garden Risotto with Chicken
The garden risotto isn't actually a risotto--it's made with orzo pasta instead of arborio rice.  The kids ate this up fast, so it's definitely something I'll make again.  It also reheats extremely well.

Start off with a chopped onion and minced garlic cooking in some oil.  Add a couple of cans of condensed chicken broth, 1-3/4 cups of orzo, and some broccoli florets (I used a 16-oz bag of frozen California Veg).  After a few minutes, add about 1-1/2 lb diced chicken breast and a can of whole kernel corn (undrained).  Season with salt and pepper, then stir in some grated Parmesan cheese.

My husband loves to fix a pot of beans every now and then, something that's classically southern, just like he is!  We've found we like to use the 15-bean soup mix because it adds a little variety (and I happen to love butter beans) instead of just plain pinto beans.  We also add a little extra flavor and protein by cooking the beans with a smoked turkey leg and season it up with a little onion powder.  Normally, I throw the pre-soaked beans with the turkey leg in the crockpot in the morning, so we'll have a nice, hot meal by the time we get home in the evening.  If you want to make this a truly southern dish, serve with turnip greens, fried potatoes, cornbread, and a little homemade chow chow relish.  (This condiment deserves its own blog entry, but thanks to a little elbow grease earlier in the year, Hubby and I put up about 14 jars of the glorious golden relish...oh the delicious sweet heat is tantalizing!)

Jalapeno Cheddar Cornbread
It's been a couple of years since I've made it, but since our jalapeno plant is putting off pods, I decided to go with Ina Garten's jalapeno cheddar cornbread recipe.  The only change I made to the recipe was to cut the amount of butter.  I couldn't put 2 whole sticks of butter in a pan of cornbread in good conscience, so I cut it back to just 1 stick and didn't really miss it.

Unfortunately, if the kids got to decide, they'd skip the beans and turkey and just eat the cornbread!  My kids are such carb fiends, it's not even funny.

The balsamic glazed salmon was pretty good, although the boys weren't that interested.  I'm starting to think their palates aren't quite ready for sophisticated ingredients such as balsamic vinegar, so I think I'll shelve this recipe for a while.  But basically, you skillet fry the salmon skin side up, flip after a few minutes, and season with lemon pepper seasoning.  Add a little chicken broth, cover tightly, and braise the salmon for a few minutes.  Remove the salmon and keep warm.  To the pan, add the rest of the can of broth along with a couple of tablespoons of cornstarch and 3 Tbsp of balsamic vinegar.  Reduce the sauce until it thickens and serve salmon with sauce over rice.  Upon reheating, the flavor was fine, but the sauce turned a little jelly-like on me, and heating it up didn't seem to help it along.

Mac-n-Weenies
Something my boys have always liked was a little combo I threw together once upon a time...mac-n-cheese boosted with some cut-up hotdogs and veggies.  It became known as mac-n-weenies in our house, although now I usually make it with kielbasa instead.

When in a time crunch, I've used boxed mac-n-cheese, or sometimes I've used macaroni and added some Velveeta.  This time, however, I had some leftover fontina cheese from a quiche I'd made a couple of weeks ago, and instead of letting it sit around taking up room in my fridge, I decided to make the cheese sauce from scratch.

I started with boiling the pasta and hotdogs together, then threw in some frozen broccoli florets a few minutes into the cooking.  In another pot, I made a simple roux, melting a tablespoon of butter and adding a few tablespoons of flour.  I added the freshly-grated fontina cheese with some freshly-ground black pepper and some milk to thin it out.  I also added some shredded sharp cheddar to the mix.  (By this time, the cheese sauce was getting pretty darn tasty!)  I also added some salt-free garlic herb seasoning and a little whole grain mustard to the cheese sauce...gives a little extra "pep" to the dish without going overboard.  Mix in the pasta, meat, and broccoli, and stir to coat.  Et voila!  A hearty meal that also happens to reheat really well that the kids just LOVE!

Razzy Jazzy Berry Tarts
I don't usually take the time to make desserts, unless it's for a special occasion.  But since I had all these blueberries I needed to use up, I found this recipe for Razzy Jazzy Berry Tarts in the most recent issue of Taste of Home magazine.

This is so simple to make.  The little cups taste a lot like shortbread, and since you don't add any sugar to it, it helps balance out the sweetness of whatever fillings you care to use.  I'm thinking of all kinds of possibilities with this now!

Anyway, the tarts were absolutely delicious, even though I didn't take the time to make the little stars and stripes out of additional dough to go on the tops.  I tried using powdered sugar, but the moisture from the filling made that a mere exercise in futility.  Still, they were very good.

The last thing I made (although actually it was the first thing I made because then I was sipping on it while cooking the other dishes) was the Watermelon Slush.  There are lots of versions out there for similar drinks, some with alcohol, some with mint, some with lime, and some with lemon-lime soda.  To give you an idea, check out this recipe on allrecipes.com for Watermelon Agua Fresca.  I didn't have any mint leaves, so I had to skip that, but my recipe was just watermelon chunks, sugar, lime juice, and ice cubes, all in the blender.  Admittedly, the ice cubes have a tendency to water down the final product, so next time I'm going to try making it with frozen chunks of watermelon instead.  I might even add some pink lemonade mix to it (the powder, not the actual drink) and see how that goes.  But be careful with that if adding the lime juice on top of it--you don't want something so tart, it's undrinkable!

So that's what I've been up to.  And once again, we near the end of another week.  More recipes next time, but until then, friends, happy cooking!  :)

Friday, July 15, 2011

Comfort Food is Chicken and Dumplings!

On the back of the 4th of July weekend, my menu plans for the week ahead were admittedly a little bit screwy.  We had leftovers, we had people visiting, and we had dinners in restaurants that may or may not have been planned ahead of time.

That's a sure fire way to mess up your routine, let's just say!

However, this past week we saw a few oldies but goodies and a couple of new recipes.  Here's what I fixed:
  • Shrimp Fried Rice
  • Cheese Tortellini, Spinach, and Meatball Soup
  • Baingan Bharta (a.k.a. Eggplant Curry)
  • Classic Chicken and Dumplings
The shrimp fried rice recipe came from Allrecipes.com, which happens to be one of my all-time favorite recipe websites.  I like the fact that you can read a lot of reviews and see how people may have changed things up, before you try it for yourself.

I ended up using an entire bag of bean sprouts in my recipe, which meant I had to increase the soy sauce to get it closer to the flavor I wanted.  I also added a little allspice to it, some cut-up baby corn, and sliced fresh mushrooms.  While I felt it lacked a little something in the flavor department, my kids DEVOURED it!  I found that a little sweet chili sauce helps to liven up the dish nicely, too.  If I make it again (and it looks like I'm gonna have to), I will increase the amount of shrimp, given the proportion of shrimp to the rest of the ingredients, and increase the number of eggs from 2 to 3.  Also, I think I will cook my eggs separately and add them in at the end, rather than coating the rice with the egg mixture, which is not something I'm used to.

Next up was the cheese tortellini soup.  This is something I threw together a while back, and my oldest boy told me it was a "keeper."  Basically, start with 2 packets of Savory Garlic and Herb soup mix.  Dump that in your pot and add about 3 quarts of water.  Bring to a boil.  Add in a bag of frozen cheese tortellini and about 1 pound of Italian-style frozen meatballs.  Return to a boil and cook for about 5 minutes.  Taste the soup and season as necessary with salt and pepper (though we tend to leave salt out as much as possible).  Now add about 2 cups fresh baby spinach leaves and stir, just giving it long enough to wilt the spinach.  Ta-da!  Serve topped with grated Parmesan cheese and, if you choose, hot garlic bread.  Oh, so good!

The baingan bharta (eggplant curry) turned out to be a flop for my 5-year-old, but I loved it!  I tried to get him to taste a spoonful, at which time he informed me that he didn't actually like eggplant.  (NOW he tells me?!)  This is not entirely true, however, because he eats it up willingly when presented in lasagna form.  Anyway, no problem, just means more for myself.  It was way too spicy for the 2-year-old critic, so I didn't even bother giving it to him.  My photo here doesn't really do it justice...I took it with my cell phone, and the camera is--in technological terms--virtually obsolete.

I started with 1 medium and 2 small eggplants that I bought from the farmers' market, and roasted them in the oven as described in the recipe.  The recipe, although not entirely authentic in method, produces a good flavor and nice spice.  For this attempt, I simply scooped and scraped the soft eggplant out of the skins after they had cooled, but I would recommend actually chopping up the flesh with a knife, on account of the somewhat stringy and fibrous texture that eggplant usually has.  I used a jalapeno picked from our own garden, and it's a good thing I removed the seeds and veins because it still gave the dish a lot of heat.  Serve this over rice or with pita bread.

Last, but definitely not least, is my chicken and dumplings.  I like to use chicken thighs on the bone because dark meat imparts so much flavor to the dish.  But feel free to use breast meat, if that's what you prefer.  Here's my recipe, which I've put together after numerous attempts (mostly FAILED attempts) at making this classic comfort food.


Nabela's Chicken and Dumplings
(Serves 4)

  • 3-4 large chicken thighs, bone in, skin intact (if using frozen chicken, no need to thaw)
  • 1 chicken stock cube
  • salt and pepper to taste
  • 1 cup milk or cream
  • 3 Tbsp corn starch
  • 8 oz frozen peas and carrots
  • 1 can refrigerated biscuits (10 small or 6 jumbo)
  1. In a large, heavy pot, add the chicken thighs and enough water to completely cover.  Add chicken stock cube.  Bring to a boil, then reduce heat to medium and simmer for 30-40 minutes.
  2. Remove chicken from broth.  When cool enough to handle, remove and discard skins and bones.  Shred remaining chicken meat into small pieces.
  3. Taste broth and season to taste with salt and pepper.
  4. Dissolve cornstarch in milk or cream and add to broth.  Return broth to a boil.  Add peas and carrots and chicken meat.  Reduce heat to medium.
  5. Using fingers, pinch off small pieces of biscuit dough and roll into balls.  (For my kids, I make the dumplings about 1/2" to 3/4" in diameter, since they will plump up after cooking.)  Drop gently into broth.  Cover tightly and reduce heat further to medium-low.  Allow to simmer undisturbed for about 15 minutes until dumplings are cooked through.  Do not stir dumplings!  Serve and enjoy!
It's Friday already, so I'm going to have to go off and plan out what I'm cooking this weekend for next week.  Seems like the weeks are going by faster these days, doesn't it?  Anyway, I hope some of this was useful to you.

Until next week, happy cooking!  :)